Quantcast
Channel: GizRom
Viewing all 917 articles
Browse latest View live

Install Android 8.0/8.1 OREO ROM On OnePlus 5T [Omni 8.0/8.1 ROM]

$
0
0

Akash Bagchi

Android 8.08.1 OREO ROM On OnePlus 5T Omni 8.08.1 ROM - Install Android 8.0/8.1 OREO ROM On OnePlus 5T [Omni 8.0/8.1 ROM]

Install Android 8.0/8.1 OREO ROM On OnePlus 5T [Omni 8.0/8.1 ROM]

Someday ago OnePlus launched their new device OnePlus 5T. After release root and TWRP for this device now time to make custom ROM, and today we found Omni 8.0/8.1 ROM for OnePlus 5T. This custom ROM comes with the latest android version and the latest security patch. At this time OnePlus doest push OREO update in OnePlus 5T. So if you want to use AOSP based OREO ROM then you are the right place. Today we share a guide to install Android 8.0/8.1 OREO ROM on OnePlus 5T. This ROM comes with two version android 8.0 and Android 8.1.

This device comes with Android v7.0 (Nougat) with Oxygen OS 4.7. Main things that Omni 8.0/8.1 ROM gives you an opportunity to OREO experience with it comes with various types of themes. This ROM looks like stock Android but it can customize and optimized. Omni is based on the Android Open Source Project with extra contributions from many developers. This is an early build of Omni 8.0/8.1 ROM that’s why some bugs in there maybe it will fix in next update.

Omni is perfect ROM for daily usage, very smooth and optimized. Android 8.0 Oreo ROM can installed via Custom Recovery like TWRP, so you need to install TWRP recovery on OnePlus 5T. If you already installed recovery then let’s begin with the tutorial.

Features of Omni 8.0/8.1 OREO ROM:-

  • Split Screen.
  • New pixel Launcher.
  • Quick Reply from Notification to messages without opening apps.
  • New Settings Design with Sidebar.
  • Data Saver.
  • Manage quick tiles with drag and drop.
  • Redesigned Status bar with awesome animations.
  • And much more.

Check Also: –

Install CM 14.1 For Redmi Note 3 Snapdragon version [VoLTE supported]

Download Latest 7.10.12 Global BETA MIUI 9 ROM For Redmi 3/Prime

Install Global Stable MIUI 8.5.3.0 ROM For Xiaomi Mi4i

Install Lineage OS 15 Based Android 8.0 Oreo On OnePlus 3/3T

Prerequisites:

  • It erases everything on your device so,  creates a full backup of your device.
  • Need to install a custom recovery on your device.
  • Your device at least to 40-50% charge for flashing.
  • Download OREO ROM and Gapps file.
  • Read the instructions carefully.

⇓⇓ Download Omni OREO ROM On OnePlus 5T ⇓⇓

Omnirom 8.0: omni-8.0.0-20171207-oneplus5t-HOMEMADE.zip

Omnirom 8.1: omni-8.1.0-20171217-oneplus5t-HOMEMADE.zip

Gapps.zip

Guide To Install:

  • Download ” omni-8.x.0-20171207-oneplus5t-HOMEMADE.zip ” and ” Gapps.zip “.
  • Copy both files to your device.
  • Turn off your phone and enter recovery mode.
  • In recovery go to ” Wipe And Format Option ⇒ Wipe Data, Cache And Dalvik Cache ” via recovery.
  • Now back to recovery menu and go to Install.
  • Then navigate to the omni-8.x.0-20171207-oneplus5t-HOMEMADE.zip file, and swipe for flashing.
  • When the process Completes, again click on install then install Gapps file.
  • Then reboot your device.

Note: The first-time Reboot will take 4-5 minutes to boot, don’t interrupt the process.

Please share this content if you like this post and subscribe our newsletter for more exclusive content … 🙂 🙂 🙂

The post Install Android 8.0/8.1 OREO ROM On OnePlus 5T [Omni 8.0/8.1 ROM] appeared first on GizRom.com.


Install EMUI 5.0 Honor 5C B357 Nougat Firmware [Europe]

$
0
0

abhishek shingan

Install EMUI 5.0 Honor 5C B357 Nougat Firmware [Europe]

Install EMUI 5.0 Honor 5C B357 Nougat Firmware [Europe]

Install EMUI 5.0 Honor 5C B357 Nougat Firmware [Europe]Honor 5C was launched in April 2016. Today Huawei send B357 update that comes for European Honor 5C. Many users do not get this B357 update. B357 nougat firmware is now available for manually update. Today we share EMUI 5.0 Honor 5C B357 Nougat Firmware Europe variant device. The ROM packs with the latest Android 7.0 Nougat firmware which is based on the latest EMUI 5.0 OS. If you want to install this update manually then follow the guide.

Previous year Honor 5C launched in Europe. The Huawei 5C runs 1.2GHz octa-core it comes with 2GB of RAM. Internal storage is 16 GB GB that can be expanded up to 128 GB via a microSD. It has 5.0-inches IPS LCD capacitive touchscreen with a resolution of 720 x 1280 pixels. It has a Non-removable Li-Ion 2200 mAh battery.

This update brings new security patch with EMUI 5.0. Also, more optimizes system performance and stability. Download Honor 5C B357 Nougat firmware from below. This is the latest firmware update. This firmware flash by stock recovery. First, unroot of your device and then follow posted flashing method. Honor 5C B357 nougat Firmware which is 1.3 GB in size and has a build number NEM-L51C432B357. If you are new in this process then, please first read the guide carefully and update your device.

Firmware Details:-

  • Android Version: Nougat v7.0
  • UI Version: EMUI 5.0
  • Firmware Versions: B357
  • Device name: Honor 5C
  • Model number: NEM-L51
  • Build Number: NEM-L51C432B357
  • Status: Official
  • Region: Europe

Preparation:-

  • At first, check your device model number, don’t try this firmware on other variant devices.
  • Backup all phone data and important things.
  • Your device at least needs 60% charge for flashing.

⇓⇓ Download Honor 5C B357 Nougat Firmware ⇓⇓

Update.Zip

Update_data_Full_NEW-L51_hw_eu.Zip

Recommended For You:

Guide To Install Update:-

  • Download Update.zip File.
  • Extract file.
  • Create ” dload ” folder to root of the SDcard.
  • Copy ” UPDATE.APP ” into the ” dload ” folder.
  • Open dial pad and type “ *#*# 2846579#*# * ”.
  • Select software upgrade > SDcard upgrade > confirm the installation.
  • Flashing will start. after flashing process did your phone automatic reboot.

Guide To Install EU Cust:-

  • Download ” Update_data_Full_NEW-L51_hw_eu.Zip ” file.
  • Extract file.
  • Delete the previous UPDATE.APP file from ” dload ” folder.
  • Now copy ” UPDATE.APP with some other files ” into the ” dload ” folder (delete the previous file).
  • Open dial pad and type “ *#*# 2846579#*# * ”.
  • Select software upgrade > SDcard upgrade > confirm the installation.
  • Flashing will start. after flashing process did your phone automatic reboot.

Note: The first time it’s takes 5-10 minutes to boot.

For a more latest update please like our Facebook and other social pages … 🙂 🙂 🙂

The post Install EMUI 5.0 Honor 5C B357 Nougat Firmware [Europe] appeared first on GizRom.com.

Install Android 8.0 Oreo ROM On Zenfone 3 ZE520KL [Leaked]

$
0
0

Akash Bagchi

Android 8.0 Oreo ROM On Zenfone 3 ZE520KL - Install Android 8.0 Oreo ROM On Zenfone 3 ZE520KL [Leaked]

Install Android 8.0 Oreo ROM On Zenfone 3 ZE520KL [Leaked]Android 8.0 Oreo ROM On Zenfone 3 ZE520KL

ASUS now rolling out OREO update on their old devices. Now ASUS send OREO update for ASUS Zenfone 3. Today we share a guide to install Android 8.0 Oreo ROM On Zenfone 3 ZE520KL. Officially this update does not come with this device but beta Oreo release for registered user. One XDA member successfully extracted this Oreo ROM On Zenfone 3. This Oreo ROM comes with WW_15.0410.1711.6_0 build version.

The ASUS ZenFone 3 comes with Android 6.0.1 (Marshmallow). The ASUS ZenFone 3 powered by 2GHz octa-core Qualcomm Snapdragon 625 processor and it comes with 4GB of RAM. It has 5.5 inches IPS LCD capacitive touchscreen, with 1080 x 1920 pixels resolution. This device gives you snap 16-megapixel rare camera and 08-megapixel front camera. It has a Non-removable Li-Ion 3000 mAh battery.

Earlier we have posted 14.2020.1711.80 Firmware On ZenFone 3 (ZE520KL/ZE552KL). Today we share latest leaked Oreo ROM on Zenfone 3 ZE520KL. The official beta Oreo might be released in the first half of January 2018. As this has some of the bugs because it is beta ROM, not stable. Whatever let’s go to the main post.

Firmware Details:-

  • Android Version: Android v8.0 (OREO)
  • UI Version: ZEN UI
  • Device name: ASUS ZenFone 3
  • Model number: ZE520KL
  • Firmware Versions: WW_15.0410.1711.6_0


⇓⇓ Download Oreo ROM On Zenfone 3 ZE520KL ⇓⇓

Zenfone 3_ZE520KL_WW_15.0410.1711.6.0

Mirror link

GizRom Recommendations:

Install Lineage OS 15 Based Android 8.0 Oreo On OnePlus 3/3T

Install WW_V20.31.49.2 Nougat Firmware For ZenFone 3 Zoom

Download Android 8.0 Oreo Stock Firmware For HTC U11 (All Collection)

Install AOSP 8.0 EXP Based Android 8.0 Oreo On Nexus 4

Guide To Install CyanogenMod 13 In Asus Zenfone 6

Preparation:-

  • Please, first of all, check your device model number.
  • Make sure that your ZenFone 3 ZE552KL running on WW-14.2020.1711.75.
  • Make sure that install stock recovery on your ZenFone 3 ZE552KL.
  • Backup all phone data and important things.
  • Your device at least needs 50% charge for flashing.

Guide To Install:-

  • Download ” WW_15.0410.1711.6_0.zip ” file from the above-mentioned link.
  • Move the download file to your External storage.
  • Now rename the file name ” WW_15.0410.1711.6_0.zip“.
  • Turn off your phone and enter Recovery Mode by Volume Down + Power Key at the same time.
  • In recovery menu click Apply update from your device storage.
  • Then select to install the .zip, which you downloaded before.
  • Wait for complete this process.
  • After process done reboot your device.

For a more latest update please like our social pages and subscribe newsletter… 🙂 🙂 🙂

The post Install Android 8.0 Oreo ROM On Zenfone 3 ZE520KL [Leaked] appeared first on GizRom.com.

G930PVPS5BQK1 Galaxy S7 SM-G930P Nougat Firmware (Nov 2017)

$
0
0

Akash Bagchi

G930PVPS5BQK1 Galaxy S7 SM G930P Nougat Firmware - G930PVPS5BQK1 Galaxy S7 SM-G930P Nougat Firmware (Nov 2017)

G930PVPS5BQK1 Galaxy S7 SM-G930P Nougat Firmware (Nov 2017)G930PVPS5BQK1 Galaxy S7 SM-G930P Nougat Firmware

The G930PVPS5BQK1 update is ready for Samsung Galaxy S7 SM-G930P Sprint variant. Previously we already posted the nougat firmware for Galaxy S7 Sprint variant. Now we will also upload the G930PVPS5BQK1 Galaxy S7 SM-G930P Nougat Firmware. Officially Samsung launched the latest G930PVPS5BQK1 Galaxy S7 SM-G930P Nougat Firmware with latest November 2017 Security Patch. Enjoy via this update some exclusive features that introduced in this Android nougat update.

Samsung Released Samsung Galaxy S7 smartphone with Android v6.0 (Marshmallow). It’s a big budget smartphone in the market in India and another country. Galaxy S7 runs 1.6 GHz octa-core it comes with 4GB of RAM. This device has 5.1 inches Super AMOLED capacitive touchscreen with a resolution of 1440 x 2560 pixels display. Galaxy S7 lets you snap 12-megapixel rare camera and 5-megapixel front camera.

Some month age Samsung release nougat ROM for Sprint Galaxy S7. Now time to fix some issue and gives latest security patch. This G930PVPS5BQK1 version firmware comes with 01.11.17 security patch. We provide full speed download link Galaxy S7 SM-G930U. The firmware is only available for the Galaxy S7 SM-G930P version. You can install it via Samsung Odin tool or Samsung Kies. We will guide you how to update via Odin quickly.

Firmware Details:-

  • Android Version: Android 7.0 Nougat
  • UI Version: TouchWiz UI
  • Firmware Versions: G930PVPS5BQK1
  • Device name: Galaxy S7
  • Model Number: SM-G930P
  • Release Date: 13.11.2017
  • Android security patch level: 01.11.2017
  • Country: USA (Sprint)
  • Status: Official

Prerequisites:-

  • Make sure your device model no is SM-G930P.
  • Enable USB Debugging.
  • TURN OFF the Reactivation Lock – Go to Settings > Personal > Lock screen and Security > Find My Mobile and log in your Samsung Account. Then uncheck the turn Reactivation lock on.
  • Install Samsung Driver ⇒ Here.
  • Download and Odin and Firmware.
  • Read Instructions carefully.

⇓⇓ G930PVPS5BQK1 Galaxy S7 SM-G930P Nougat Firmware ⇓⇓

Odin.zip

USA (Sprint)

SPR-G930PVPS5BQK1-20171204092320.zip

Recommended for you:-

Stock G930PVPS4BQE1 Galaxy S7_SM-G930P Android 7.0 Firmware

G930AUCS4BQC2 Nougat OTA For Galaxy S7 With March 2017 Security Patch

Latest A710FXXU2CQE4 Galaxy A7 SM-A710FD Nougat Firmware

Install September 2017 Security Patch LG V20 T-mobile Firmware

G935AUCU4BQK2 For Galaxy S7 Edge AT&T Firmware (November 2017)

Guide To Install:-

  • First, extract Odin.zip and G930PVPS5BQK1 firmware.zip via 7zip.
  • Then switch off your phone.
  • Next turn to download mode by pressing and holding Volume Down + Home + Power.
  • After open Odin.exe into the extracted folder.
  • Then connect your phone to PC.
  • Odin will automatically detect your device
  • Then click the AP Box, and choose the” .tar ” file.
  • Check Auto Reboot and F.Reset Time options.
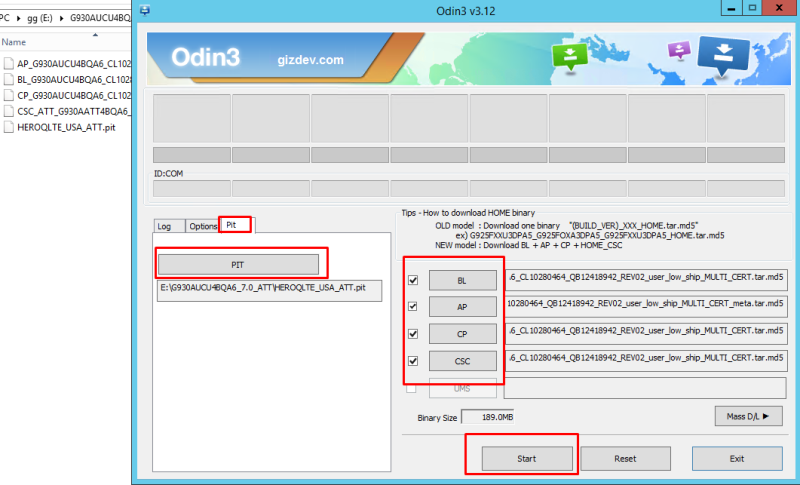
  • See the Screenshot >

  • Then click Start button to start the installation process.
  • After the process completes Finally, reboot your device and enjoy.

Read full Odin flash guide from ⇒ Here.

Note: The first time it takes 5-10 Minutes to boot your device.

Please like our social pages for more firmware link and if you face any problem during flashing then comment below.

The post G930PVPS5BQK1 Galaxy S7 SM-G930P Nougat Firmware (Nov 2017) appeared first on GizRom.com.

Guide To Install China Stable MIUI 9.1.3.0 ROM For MI Note 2

$
0
0

abhishek shingan

Guide To Install China Stable MIUI 9.1.3.0 ROM For MI Note 2

Guide To Install China Stable MIUI 9.1.3.0 ROM For MI Note 2

Guide To Install China Stable MIUI 9.1.3.0 ROM For MI Note 2Good news for MI Note 2 users, latest MIUI 9 is ready for download. It is the stable ROM For MI Note 2. Today we share China Stable MIUI 9.1.3.0 ROM For MI Note 2. Some users got the update from OTA. Remaining users will get the update soon. If you didn’t get the OTA update then follow this post to install this update. Just follow the steps and update the process easily.

MIUI 9 update brings a smart assistant, new themes, Image Search, Smart App Launcher, and performance improvements. More new themes you saw there. Also, they have a polished overall user interface and give closer to stock Android look.

Much more features are added. This is the Stable version and does not contain bugs. If you are MI Note 2 user and didn’t get this OTA update. Just follow this post and install this Global Stable MIUI 9.1.3.0 ROM for MI Note 2. Many things should have been fixed in this build, you can use it for daily usage. It is the China stable ROM so there are no bugs in it. You can use this for a daily usage.

If you are a Xiaomi MI Note 2 user you must install because it’s the official ROM and it is a stable one. MIUI 9.1.3.0 ROM For MI Note 2 comes with bug fixes so you can expect more improvements. Below are the instructions and download links follow them the ROM for MI Note 2.

Firmware Details:

  • Android Version: Android v7.0
  • MIUI Version: v9.1.3.0 NADCNEI
  • Device name: Redmi 5A
  • Status: Stable ROM
  • Region: China
Whats HOT:

Preparation:

  • Charge the device up to 60-70%.
  • Driver signature must be disabled in Windows 8,10.
  • Download Fastboot ROM or Recovery ROM.
  • Download required Mi flash tool.

⇓⇓ Download Global Stable MIUI 9.1.3.0 ROM ⇓⇓

MI Flash Tool

Recovery ROM

FastBoot ROM

Guide To Install Recovery ROM:

  • Download Recovery Flashable ROM and copy it to phone memory.
  • Turn off your phone and enter Recovery Mode by Volume UP + Power Key at the same time.
  • Then ‘ wipe and format option ⇒ wipe data, system, cache and Dalvik cache ’ via recovery.
  • Back to recovery menu and click Install.
  • Then navigate to the Recovery Flashable ROM  file, which you downloaded before.
  • Select file and swipe for install.
  • After the process is done, reboot your device.
  • The first-time Reboot will take 4-5 minutes to boot, don’t interrupt the process.

Guide To install Fastboot ROM:

Step 1: – Read Preparation.

Step 2:Install Mi Flash Tool.

Step-3:Download Fastboot ROM for your phone model and extract it via 7Zip.

Step 4: Now Turn On your phone into Download Mode by this method.

Charge The Device And HOLD Volume Up + Power On Button And Select Downlaod Mode. 

mi-download-mode

Step 5: – Connect Your Phone To Pc and Run Mi Flash Tool “MiFlash.Exe” From “C:\Program Files (x86)\Xiaomi\MiPhone “.

Step-6:Check For Qualcomm HS-USB QDloader Port If  Driver Not Installed Install Manually  Browse Driver From “C:\Program Files (x86)\Xiaomi\MiPhone”.

Step 7:Now Click “Browse” In Mi Flash Tool And Browse The Fastboot Rom Folder And Select Flash All.

mi-flash-tool-redmi-3s

Step 8: – Click On Refresh And Flash Button Wait For The Firmware Update Phone Will Auto Reboot After It Done.mi-flash-tool

Like Xiaomi Dev For Mi Redmi Updates  https://www.facebook.com/XiaomiDev

Like Share Comment Bellow For Any Help 🙂

The post Guide To Install China Stable MIUI 9.1.3.0 ROM For MI Note 2 appeared first on GizRom.com.

G935TUVS4BQL2 For Galaxy S7 Edge T-Mobile Firmware (Dec 2017)

$
0
0

Akash Bagchi

G935TUVS4BQL2 For Galaxy S7 Edge T Mobile Firmware - G935TUVS4BQL2 For Galaxy S7 Edge T-Mobile Firmware (Dec 2017)

G935TUVS4BQL2 For Galaxy S7 Edge T-Mobile Firmware (Dec 2017)G935TUVS4BQL2 For Galaxy S7 Edge T-Mobile Firmware

The G935TUVS4BQL2 update is ready for Galaxy S7 Edge T-Mobile variant. If you want more custom ROM or stock firmware then search on our blog. Samsung firmware links fully unlocked for full speed download. Officially Samsung launched the latest Android 7.0 G935TUVS4BQL2 For Galaxy S7 Edge T-Mobile Firmware with December 2017 Security Patch. If you don’t update your device to latest security patch then you are the right place. Install this latest G935TUVS4BQL2 update on your Galaxy S7 Edge and enjoy.

Samsung Released Samsung Galaxy S7 Edge smartphone with Android v6.0 (Marshmallow). It’s a big budget smartphone in the market in India and another country. Galaxy S7 Edge runs 1.6 GHz octa-core it comes with 4GB of RAM. This device has 32 GB internal storage. Galaxy S7 Edge has 5.5 inches Super AMOLED capacitive touchscreen with a resolution of 1440 x 2560 pixels display. Galaxy S7 Edge lets you snap 12-megapixel rare camera & 5-megapixel front camera.

This update also changed some changelog, the new item added and latest December [01.12.2017] security patch update with other some new features added. We created the direct download link of G935TUVS4BQL2 for Galaxy S7 Edge T-Mobile Firmware. This firmware only for Galaxy S7 Edge SM-G935T (T-Mobile) version device. You can install via Samsung Odin tool or Samsung Kies we will guide you how to install via Odin.

Firmware Details:-

  • Android Version: Android 7.0 Nougat
  • UI Version: TouchWiz UI
  • Firmware Versions: G935TUVS4BQL2
  • Device name: Galaxy S7 Edge
  • Model number: SM-G935T
  • Release Date: 06.12.2017
  • Android security patch level: 01.12.2017
  • Country: T-Mobile
  • Status: Official (Full firmware)
  • File size: 2.32GB

Changelog:

  • Device stability improvements, bug fixes.
  • New and/or enhanced features.
  • Further improvements to performance.

Requirements:

  • Make sure your device model no is SM-G935T.
  • Enable USB Debugging.
  • TURN OFF the Reactivation Lock – Go to Settings > Personal > Lock screen and Security > Find My Mobile and log in your Samsung Account. Then uncheck the turn Reactivation lock on.
  • Install Samsung Driver ⇒ Here.
  • Download and Odin and Firmware.
  • Read Instructions carefully.

⇓⇓ Download G935TUVS4BQL2 For Galaxy S7 Edge T-Mobile Firmware ⇓⇓

Odin.zip

TMB-G935TUVS4BQL2-20171221170100.zip

You may like also:

Install B613/B614 Huawei P8 Lite Latest Update (Europe)

[OTA] G891AUCU2BPL4 Android 7.0 Nougat Firmware For Galaxy S7 Active SM-G891A

G925TUVU5FQG3 On Galaxy S6 Edge SM-G925T Firmware (July 2017)

Install Pre-rooted Galaxy S7 Edge Nougat Beta 3 [TWRP Flashable]

G955USQU1AQHD Galaxy S8 Plus SM-G955U Firmware (Sept 2017)

Guide To Install:-

  • First, extract Odin.zip and G935TUVS4BQL2 firmware.zip via 7zip.
  • Then switch off your phone.
  • Next turn to download mode by pressing and holding Volume Down + Home + Power.
  • After open Odin.exe into the extracted folder.
  • Then connect your phone to PC.
  • Odin will automatically detect your device
  • Then click the AP Box, and choose the” .tar ” file.
  • Check Auto Reboot and F.Reset Time options.
  • See the Screenshot >

  • Then click Start button to start the installation process.
  • After the process completes Finally, reboot your device and enjoy.

Read full Odin flash guide from ⇒ Here.

Note: The first time it takes 5-10 Minutes to boot your device.

Your ROM is Ready now if you face any problem comment below.

The post G935TUVS4BQL2 For Galaxy S7 Edge T-Mobile Firmware (Dec 2017) appeared first on GizRom.com.

G950USQS2BQL1 For Galaxy S8 T-Mobile Firmware (Dec 2017)

$
0
0

Akash Bagchi

G950USQS2BQL1 For Galaxy S8 T Mobile Firmware - G950USQS2BQL1 For Galaxy S8 T-Mobile Firmware (Dec 2017)

G950USQS2BQL1 For Galaxy S8 T-Mobile Firmware (Dec 2017)G950USQS2BQL1 For Galaxy S8 T-Mobile Firmware

The G950USQS2BQL1 update is ready for Galaxy S8 T-Mobile variant. We always share Samsung firmware links fully unlocked for full speed download. Officially Samsung launched the latest Android 7.0 G950USQS2BQL For Galaxy S8 T-Mobile Firmware with December 2017 Security Patch. If you don’t update your device to latest security patch then you are the right place. Install this latest G950USQS2BQL1 update on your Galaxy S8 SM-G950U and enjoy. Let’s talk about the device.

Samsung released Galaxy Note 8 smartphone with Android v7.1.1 (Nougat). Galaxy Note 8 devices run 1.6G Hz octa-core Qualcomm Snapdragon 835 processor and it comes with 6GB of RAM. This device has 64/128/256 GB. Galaxy Note 8 has 6.3 inches Super AMOLED capacitive touchscreen with a resolution of 1440 x 2560 pixels display. This device has Dual 12-megapixel rare camera for photo and 8-megapixel front camera for the selfie.

This update brings some new item and latest December [01.12.2017] security patch update with other some new features. We created the direct download link of G950USQS2BQL1 for Galaxy S8 T-Mobile Firmware. This firmware only for Galaxy S8 SM-G950U (T-Mobile) version device. You can install via Samsung Odin tool or Samsung Kies we will guide you how to install via Odin.

Firmware Details:-

  • Android Version: Android 7.0 Nougat
  • UI Version: TouchWiz UI
  • Firmware Versions: G950USQS2BQL1
  • Device name: Galaxy S8
  • Model number: SM-G950U
  • Release Date: 05.12.2017
  • Android security patch level: 01.12.2017
  • Country: T-Mobile
  • Status: Official (Full firmware)
  • File size: 3.5 GB

Requirements:

  • Make sure your device model no is SM-G950U.
  • Enable USB Debugging.
  • TURN OFF the Reactivation Lock – Go to Settings > Personal > Lock screen and Security > Find My Mobile and log in your Samsung Account. Then uncheck the turn Reactivation lock on.
  • Install Samsung Driver ⇒ Here.
  • Download and Odin and Firmware.
  • Read Instructions carefully.

⇓⇓ Download G950USQS2BQL1 For Galaxy S8 T-Mobile Firmware ⇓⇓

Odin.zip

TMB-G950USQS2BQL1-20171222142153.zip

You may like also:

Download Stock Full Android 7.0 Galaxy Note 5 SM-N920A AT&T Firmware

T580UEU2BQF1 USA Galaxy Tab A SM-T580 Firmware (June 2017)

N950USQU1AQI5 On Sprint Galaxy Note 8 SM-N950U Firmware

Install Android 7.0 Lenovo K6 Note Nougat Firmware

Update G950USQU1AQDE Firmware For Galaxy S8 SM-G950U (US)

Guide To Install:-

  • First, extract Odin.zip and G950USQS2BQL1 firmware.zip via 7zip.
  • Then switch off your phone.
  • Next turn to download mode by pressing and holding Volume Down + Home + Power.
  • After open Odin.exe into the extracted folder.
  • Then connect your phone to PC.
  • Odin will automatically detect your device
  • Then click the AP Box, and choose the” .tar ” file.
  • Check Auto Reboot and F.Reset Time options.
  • See the Screenshot >

  • Then click Start button to start the installation process.
  • After the process completes Finally, reboot your device and enjoy.

Read full Odin flash guide from ⇒ Here.

Note: The first time it takes 5-10 Minutes to boot your device.

If you want more this type of content then please like our social pages and regularly follow our blog.

The post G950USQS2BQL1 For Galaxy S8 T-Mobile Firmware (Dec 2017) appeared first on GizRom.com.

N950USQU2BQLA Firmware For Galaxy Note 8 T-Mobile (Dec 2017)

$
0
0

Akash Bagchi

N950USQU2BQLA Firmware For Galaxy Note 8 T Mobile - N950USQU2BQLA Firmware For Galaxy Note 8 T-Mobile (Dec 2017)

N950USQU2BQLA Firmware For Galaxy Note 8 T-Mobile (Dec 2017)N950USQU2BQLA Firmware For Galaxy Note 8 T-Mobile

The N950USQU2BQLA full firmware is live for Samsung Galaxy Note 8 SM-N950U smartphone. We always share full speed Samsung firmware download link for you. Samsung sends the latest N950USQU2BQLA Firmware For Galaxy Note 8 T-Mobile. that comes with latest December Security patch. If you don’t update your device, to latest security patch then you are the right place.

Samsung released Galaxy Note 8 smartphone with Android v7.1.1 (Nougat). Galaxy Note 8 devices run 1.6GHz octa-core Qualcomm Snapdragon 835 processor and it comes with 6GB of RAM. Galaxy Note 8 has 6.3 inches Super AMOLED capacitive touchscreen with a resolution of 1440 x 2560 pixels display. This device has Dual 12-megapixel rare camera for photo and 8-megapixel front camera for the selfie.

This update brings some new item and latest December [01.12.2017] security patch update with other some new features. We created the direct download link of N950USQU2BQLA for Galaxy Note 8 T-Mobile Firmware. This firmware only for Galaxy S8 SM-N950U (T-Mobile) version device. You can install via Samsung Odin tool or Samsung Kies we will guide you how to install via Odin.

Firmware Details:-

  • Android Version: Android 7.1.1 Nougat
  • UI Version: Samsung experience UI
  • Firmware Versions: N950USQU2BQLA
  • Device name: Galaxy Note 8
  • Model number: SM-N950U
  • Release Date: 11.12.2017
  • Android security patch level: 01.12.2017
  • Country: USA (T-Mobile)
  • PDA: N950USQU2BQLA
  • CSC: N950UOYN2BQLA
  • File size: 3.5GB

Prerequisites:-

  • Make sure your device model no is SM-N950U.
  • Enable USB Debugging.
  • TURN OFF the Reactivation Lock – Go to Settings > Personal > Lock screen and Security > Find My Mobile and log in your Samsung Account. Then uncheck the turn Reactivation lock on.
  • Install Samsung Driver ⇒ Here.
  • Download and Odin and Firmware from below.
  • Read Instructions carefully.

⇓⇓ Download N950USQU2BQLA Firmware For Galaxy Note 8 ⇓⇓

Odin

TMB-N950USQU2BQLA-20171222111906.zip

More firmware for you:

Install MiUI 8 ROM On Galaxy S7 Edge SM-G9300/50

Update Huawei Mate 9 MHA-L09/MHA-L29 B190 Firmware [Europe]

Install OxygenOS 4.5.11 for OnePlus 5 Security patch September 2017

Guide To Install Global Stable MIUI 8.2 ROM For Redmi Note 4

Stable Multirom Miui7 v7.2.5 Custom Rom For Redmi Note 3 [Mtk]


Guide To Install:-

  • First, extract Odin.zip and N950USQU2BQLA firmware.zip via 7zip.
  • Then switch off your phone.
  • Next turn to download mode by pressing and holding Volume Down + Home + Power.
  • After open Odin.exe into the extracted folder.
  • Then connect your phone to PC.
  • Odin will automatically detect your device
  • Then click the AP Box, and choose the” .tar ” file.
  • Check Auto Reboot and F.Reset Time options.
  • See the Screenshot >

  • Then click Start button to start the installation process.
  • After the process completes Finally, reboot your device and enjoy.

Read full Odin flash guide from ⇒ Here.

Note: The first time it takes 5-10 Minutes to boot your device.

If you want more this type of content then please like our social pages and regularly follow our blog.

The post N950USQU2BQLA Firmware For Galaxy Note 8 T-Mobile (Dec 2017) appeared first on GizRom.com.


Download EMUI 8.0 Based Honor 8 Pro OREO Firmware [8.0.0.305][India]

$
0
0

Akash Bagchi

EMUI 8.0 Based Honor 8 Pro OREO Firmware - Download EMUI 8.0 Based Honor 8 Pro OREO Firmware [8.0.0.305][India]

Download EMUI 8.0 Based Honor 8 Pro OREO Firmware [8.0.0.305][India]EMUI 8.0 Based Honor 8 Pro OREO Firmware

Good news for Honor 8 Pro Indian users. Today we found for you EMUI 8.0 Based Honor 8 Pro OREO Firmware. Huawei skips EMUI 6.0 or 7.0 update and jumps straight to EMUI 8.0. At this time this firmware in beta version. If you want to install this OREO Honor 8 update then follows the guide below. This update based on the Android 8.0 operating system. We found Android Oreo Firmware for Honor 8 Pro DUK-L09 on HiCloud.

Beta android 8.0 OREO update now available with latest build C675 version. Many users asking when Huawei release OREO for Honor 8 Pro. Today we share the full firmware link and full process to update your device to OREO version. This EMIUI 8.0 update is available for DUK-L09 variants in All Regional users.

EMUI 8.0 comes with lots of new features. Like new floating Navigation dock, new split-screen key, New smart notifications, and home key shortcut. If you want to update your device, then you are the right place. Here the EMUI 8.0 Based Honor 8 Pro OREO Firmware. First, unlock the bootloader of your device and then follow posted flashing method. This update comes with build number DUK-L09 8.0.0.305. If you are new in this process then, please first read the following step.

Firmware Details:-

  • Android Version: Android v8.0 (OREO)
  • UI Version: Emotion UI 8.0
  • Firmware Versions: B305
  • Device name: Honor 8 Pro
  • Model number: DUK-L09
  • Release Date: 09.11.2017
  • Firmware: DUK-L09 8.0.0.305
  • Status: Official
  • Region: All
  • Changelog: Click here.
You may also like:-

Install EMUI 8.0 on Huawei Mate 9 OREO Update [Beta]

N920CXXU3CQB9 Android 7.0 Nougat Firmware For Galaxy Note 5 [All Variants]

Install B150 Honor 8 Android 6.0.1 OTA [FRD-L02] [India]

Install B394 Update For Honor 8 FRD-L09/L02 Nougat Europe

G920PVPS4DQE2 May Security Nougat Update For Galaxy S6 SM-G920P

Preparation:

  • At first, check your device model number.
  • Backup complete phone data like contacts, messages, and apps.
  • Your device at least needs 50-60% charge for flashing.
  • You need to unlock the bootloader of your device and install TWRP recovery.

⇓⇓ Download EMUI 8.0 Based Honor 8 Pro OREO Firmware ⇓⇓

Update.zip

update_data_full_public.zip

update_full_DUK-L09I_hw_in.zip

Recovery files:

DUK-RECOVERY-NoCheck.img

DUK-RECOVERY2-NoCheck.img

Guide To Install Update:

  • First, create HWOTA folder to Desktop.
  • Download  “update.zip” “update_data_full_public.zip” and “update_full_***-***_***.zip” and recovery files.
  • Then copy all files to an HWOTA\update folder.
  • Now boot your device into TWRP mode by Volume Up + Power.
  • Ones you’re in TWRP go to Wipe > Format data.
  • Now plug in the USB cable and copy HWOTA file in your phone storage.
  • After this process back to recovery menu and go to Advanced > Terminal.
  • In the TWRP terminal, enter the following commands.
    • The first command creates an update folder inside the data folder, in the root of your device.
    • The second command moves the HWOTA folder to the update folder.
mkdir /data/update
mv /sdcard/HWOTA /data/update/HWOTA
  • Then flash recovery using this commend.
dd if=/sdcard/DUK-RECOVERY-NoCheck.img of=/dev/block/bootdevice/by-name/recovery_a
dd if=/sdcard/DUK-RECOVERY2-NoCheck.img of=/dev/block/bootdevice/by-name/recovery2_a
  • After flashing process is done now delete recovery file from HWOTA folder.
  • Now again enter Advanced > Terminal and follow the commend below.
echo --update_package=/data/update/HWOTA/update.zip >> /cache/recovery/command
echo --update_package=/data/update/HWOTA/update_data_full_public.zip >> /cache/recovery/command
echo --update_package=/data/update/HWOTA/update_full_DUK-L09_hw_normal.zip >> /cache/recovery/command
  • Now enter recovery mode using this.
reboot recovery
  • Wait for Complete the installation. 
  • Enjoy!

Guide To Install TWRP method:

  • Download ” required files from above “.
  • Copy all files to your device.
  • Turn off your phone and enter TWRP recovery mode.
  • In recovery go to Install.
  • Then navigate to the Update.zip file, and swipe for flashing.
  • When the process Completes, again click install option then install update_full_DUK-L09_hw_normal.zip and update_data_full_public.zip files.
  • Then reboot your device.

Note: The first time it’s takes 5-10 minutes to boot.

Like, share this post with your friends. ? ? ?

The post Download EMUI 8.0 Based Honor 8 Pro OREO Firmware [8.0.0.305][India] appeared first on GizRom.com.

Download Android 8.0 Oreo MAD OS ROM For Oukitel K6000 Plus

$
0
0

abhishek shingan

Download Android 8.0 Oreo MAD OS ROM For Oukitel K6000 Plus

Download Android 8.0 Oreo MAD OS ROM For Oukitel K6000 Plus

Download Android 8.0 Oreo MAD OS ROM For Oukitel K6000 PlusDownload Android 8.0 Oreo MAD OS ROM For Oukitel K6000 Plus MT6750. Here is the MAD OS ROM based on AOSP. As always we will get some information about Oukitel K6000 Plus. 

Oukitel K6000 Plus has a  display of 1080 by 1920 resolution and 5.5 inches of the display. The Oukitel K6000 Plus has 1.5Ghz Octa-core Mediatek 6750 processor with 4GB of RAM. Oukitel K6000 Plus is having the storage of 64GB and can be expanded up to 256GB using Micro SD card. In the concern with the camera, it has 16 megapixels rear camera and 8 megapixels front camera. Powered by 6080mAh of battery capacity a smartphone runs on Android 7.0.

This ROM comes with many new features. It is almost stable ROM if you find some of the minor bugs there, then please comment below. It is fast more than stock android. If you are Oukitel K6000 Plus user, then you must download and install this new Android 8.0 Oreo ROM on Oukitel K6000 Plus. Don’t waste time it is smooth and faster than stock ROM just downloads and flash this ROM and enjoy the experience of new nougat custom ROM on Oukitel K6000 Plus.

Working Features of MAD OS:-

  • RIL
  • GPS
  • Bluetooth
  • Audio
  • HW Decoding/Encoding
  • Camera
  • Sensors
  • FM Radio etc
  • offline charging animation 
  • many more customizable MAD OS features.
Recommended For You:

Requirements:-

  • First, take total backup of your device.
  • Make sure installed TWRP recovery on your device.
  • Need 60-70% charge for flashing on your device.
  • Download MAD OS ROM and Gapps from below.
  • Read the instruction carefully.

⇓⇓ MAD OS ROM For Oukitel K6000 Plus ⇓⇓

MADOS_OukitelK6000Plus.Zip

GAPPS.Zip

ARM64 Nano/Mini GAPPS

Guide To Install:-

  • Download “MAD OS ROM_Oukitel_K6000Plus_zip” and  “Gapps” & copy it to external memory.
  • Turn off your phone and enter Recovery Mode by Volume UP+ Power Key at the same time.
  • Then ‘ wipe and format option ⇒ wipe data, system, cache and Dalvik cache ’ via recovery.
  • Back to recovery menu and click Install.
  • Then navigate to the MAD OS ROM_Oukitel_K6000Plus_zip file, which you downloaded before.
  • Select file and swipe for install.
  • After the process is done, reboot your device into recovery.
  • Flash Gapps file (same step) and wipe caches.
  • Then Reboot your device & enjoy.
  • The first-time Reboot will take 4-5 minutes to boot, don’t interrupt the process.

Your ROM is Ready now if you face any problem comment below. 🙂

The post Download Android 8.0 Oreo MAD OS ROM For Oukitel K6000 Plus appeared first on GizRom.com.

Install PixelExperience Android 8.1 OREO ROM On Vibe K5/Plus

$
0
0

Akash Bagchi

PixelExperience Android 8.1 OREO ROM On Vibe K5Plus - Install PixelExperience Android 8.1 OREO ROM On Vibe K5/Plus

Install PixelExperience Android 8.1 OREO ROM On Vibe K5/PlusPixelExperience Android 8.1 OREO ROM On Vibe K5/Plus

Someday ago Google officially released Android 8.1 Oreo. We already share many Oreo ROM for many devices you can check on our blog. Some time ago we posted Android 8.0/8.1 OREO ROM On OnePlus 5T. Previous year Lenovo launched Vibe K5 Plus. Newly this device doesn’t get Oreo update from Lenovo, maybe Lenovo sent Oreo update but at this time many users want to use Android OREO ROM On Vibe K5/Plus. For those users today we share PixelExperience Android 8.1 OREO ROM On Vibe K5/Plus.

This device comes with Android v5.1.1 (Lollipop) with Vibe user interface but this UI not totally customize and looks not well. Main things that PixelExperience gives you an opportunity to OREO experience with it comes with Pre-installed Gapps and all Pixel stuff. This ROM looks like stock Android but it can customize and optimized. LineageOS is based on the Android Open Source Project with extra contributions from many developers. This is an early build of PixelExperience ROM that’s why some of the bugs in their maybe it will fix in next update please check the developer page (Source) before download.

PixelExperience is mainly focused on battery backup and security and optimization. PixelExperience is perfect for daily usage, very smooth and optimized. XDA member “sounak@9434” released the build of PixelExperience Android 8.1 OREO ROM On Vibe K5/Plus. Android 8.1.0 Oreo ROM can installed via Custom Recovery like TWRP, so you need to install TWRP recovery on Vibe K5/Plus. If you already installed recovery then let’s begin with the tutorial.

Working features:

  • Wifi, RIL, Mobile data, GPS
  • Camera
  • Flashlight
  • Bluetooth
  • FMRadio
  • Lights
  • Sound/vibration
  • Safetynet (Use magisk v14.6 to bypass)

What’s not working:

  • Camcorder (Use Footej Camera for now)
  • VoLTE (Use Jio4GVoice for now)
You may also like:

Download China Stable MIUI 8.5.9.0 ROM For Redmi Note 5A

Marshmallow Android 6.0.1 ResurrectionRemix ROM For Honor 8

Install CM 14.1 For Redmi Note 3 Snapdragon version [VoLTE supported]

Install CoolUI 6.0 Custom ROM For Coolpad Dazen 1

Prerequisites:

  • It erases everything on your device so,  creates a full backup of your device.
  • Need to install a TWRP recovery on your device.
  • Your device at least to 40-50% charge for flashing.
  • Download PixelExperience ROM from below.
  • Read the instruction carefully.

⇓⇓ Download PixelExperience Android 8.1 OREO ROM On Vibe K5/Plus ⇓⇓

PixelExperience_8.1.0_vibek5plus.zip

Guide To Install:

  • Download ” PixelExperience_8.1.0_vibek5plus.zip “.
  • Copy downloaded file to your device.
  • Turn off your phone and enter recovery mode.
  • In recovery go to ” Wipe And Format Option ⇒ Wipe Data, Cache And Dalvik Cache ” via recovery.
  • Now back to recovery menu and go to Install.
  • Then navigate to the PixelExperience_8.1.0_vibek5plus.zip file, and swipe for flashing.
  • When the process Completes, reboot your device.

Note: The first-time Reboot will take 4-5 minutes to boot, don’t interrupt the process.

Please share this content if you like this post and comment below if you face any problem during flashing process … 🙂 🙂 🙂

The post Install PixelExperience Android 8.1 OREO ROM On Vibe K5/Plus appeared first on GizRom.com.

Guide To Install Android 8.0 OREO MiFavor 5.2 On Axon 7 [EDL Package]

$
0
0

Akash Bagchi

Android 8.0 OREO MiFavor 5.2 On Axon 7 - Guide To Install Android 8.0 OREO MiFavor 5.2 On Axon 7 [EDL Package]

Guide To Install Android 8.0 OREO MiFavor 5.2 On Axon 7 [EDL Package]Android 8.0 OREO MiFavor 5.2 On Axon 7

Oh!!! After long days at last ZTE Axon 7 OREO update is now available for install in EDL mode. This OREO Android 8.0 update is leaked version that shares in XDA developer. Which update brings with MiFavor 5.2 for this device. If you want to install this leaked Android 8.0 OREO update on Axon 7 then follow this guide. Today we share a guide to install Android 8.0 OREO MiFavor 5.2 on Axon 7.

This MiFavor 5.2 firmware brings all OREO features with many customizations. This firmware is leaked oreo build and soon will roll out via OTA for all user. Thanks to XDA developer “asderdd” to share this OREO MiFavor 5.2 On Axon 7 firmware with us. We share all files and write full steps to install MiFavor 5.2 OREO on Axon 7.

You may also like:

Zte Axon 7 Stock Rom’s Factory Images for A2017, A2017G, A2017U

Update MiFavor 4.0 For ZTE Axon 7 Android 7.0 Nougat Manually

Install Android 8.0 Oreo Firmware On Essential Phone

Official Android 7.1 Nougat Lineage OS 14.1 For ZTE Axon 7

Install OxygenOS BETA Android 8.0 OREO On OnePlus 3/3T

This OREO MiFavor 5.2 update is compatible with A2017U and A2017G models. This MiFavor 5.2 is in the beta update but it stable enough to daily use. Let’s go to the instruction manual to install Android 8.0 OREO MiFavor 5.2 On Axon 7 on EDL mode.

Pre-requisites:-

  • Make sure your device model no is A2017U and A2017G.
  • Install Qualcomm Driver and extract it ⇒ Here
  • Download MiFlash Tool ⇒ Here and Firmware from below.
  • Your device at least needs 40% charge for flashing.
  • Read Instructions carefully.

⇓⇓ Download OREO MiFavor 5.2 On Axon 7 ⇓⇓

ZTE_A2017V3.0.0B01_FULL_EDL_PACKAGE_BY_TURKDEVS.7z

Latest version

ZTE_A2017V3.0.0B01-2_FULL_EDL_PACKAGE_BY_TURKDEVS.7z

Flash With MiFlash Tool:-

  • Download OREO EDL Firmware and Extract It.
  • Install MiFlash Tool on your computer.
  • Now open Qualcomm QUSB_BULK Drivers folder right click on qcser.inf and click on Install.
  • Then Boot your Axon 7 in EDL mode by pressing Volume Up+Volume Down+Power Button together until you are stuck on a black screen.
  • Now connect your device to the computer (your device will be detected as a COM port known as “Qualcomm HS-USB QDLoader 9008”)
  • Open MiFlash Tool.

MiFlash tool for Axon 7

  • Now open the folder for that you extract before, and copy address bar.

MiFlash tool for Axon 7

  • Paste the Address Bar in MiFlash Tool in the select bar.

MiFlash tool for Axon 7

  •  Then click the refresh button, you will see your device detect in the device box.
  • Now click ” Flash ” button.
  • Wait for the process to complete, it may take a few minutes.
  • After the process is done a message will appear in the result box.

Note: The first time it takes 5-10 Minutes to boot your device.

If any problem, please let us know and comment below … simple-smile Install Chroma [Android 6.0.1] Stable Custom Rom For Huawei Nexus 6P simple-smile Install Chroma [Android 6.0.1] Stable Custom Rom For Huawei Nexus 6P simple-smile Install Chroma [Android 6.0.1] Stable Custom Rom For Huawei Nexus 6P

The post Guide To Install Android 8.0 OREO MiFavor 5.2 On Axon 7 [EDL Package] appeared first on GizRom.com.

Install Official Android 8.0 OREO Stock ROM On Moto Z2 Force [T-Mobile]

$
0
0

Akash Bagchi

Official Android 8.0 OREO Stock ROM On Moto Z2 Force T Mobile - Install Official Android 8.0 OREO Stock ROM On Moto Z2 Force [T-Mobile]

Install Official Android 8.0 OREO Stock ROM On Moto Z2 Force [T-Mobile]Official Android 8.0 OREO Stock ROM On Moto Z2 Force T-Mobile

Good news for users of the Moto Z2 Force, Android 8.0 OREO Stock ROM is now available for Moto Z2 Force. Motorola rolled out Android 8.0 OREO OTA update for Moto Z2 Force in T-Mobile variant. Which update brings new features and December security patches. If you want to install this leaked Official Android 8.0 OREO Stock ROM On Moto Z2 Force then follow this guide.

This update brings all OREO features with December security patches. Thanks to XDA developer “joemossjr” to share this OREO Stock ROM On Moto Z2 Force with us. We share all files and write full steps to install latest OREO Stock ROM On Moto Z2 Force.

This OREO update is compatible with Moto Z2 Force T-Mobile models. Install this update your device must be running NCX26.122-59-8 version. This OREO Stock ROM On Moto Z2 Force comes with the OCX27 build number. This is a stable update and soon this update you get on your device. If you do not get this update or install now this update then you are the right place. Let’s go to the instruction to install manually Android 8.0 OREO Stock ROM On Moto Z2 Force T-Mobile variant.

Firmware Details:-

  • Android Version: Oreo v8.0
  • Device: Moto Z2 Force
  • Model Number: NCX26
  • Firmware version: WW_15.0410.1711.6
  • Build Version: OCX27
  • Android security patch level: December 2017
  • Status: Official [Stable]
You may also like:-

Latest Lenovo Vibe K5 Stock Firmware, Tool, Driver [Vo-LTE]

Download Huawei P9 Stock Rom’s International and Chinese Rom’s

Install Lineage OS 15 Based Android 8.0 Oreo On Lenovo K3 Note

Guide To Install Android 8.0 OREO MiFavor 5.2 On Axon 7 [EDL Package]

Install Optimized Oreo ROM On Galaxy S4 [Lineage OS 15]

Pre-requisites:-

  • At first, check your device model number.
  • Need your device at least to 70% charge, as the process may take a while.
  • Download WW_15.0410.1711.6 OTA.
  • Read Instruction.

⇓⇓ Downloads OREO Stock ROM On Moto Z2 Force ⇓⇓

ADB_Fastboot_tool_2016.zip

Nougat Firmware: NCX26.122-59-8.zip

Oreo OTA (OCX27): WW_15.0410.1711.6.zip

Guide To Flash Nougat File- Method #1:

  • Firstly, download the above zip File and save it your external SD Card on your device.
  • Now, It’s time to turn off the phone.
  • Then Hold Power + Vol Up button, and there you will see the recovery options select it.
  • In the recovery select Update from SD Card, and navigate to the ZIP you downloaded earlier.
  • Wait until the process finishes and then reboot your phone. 
  • DONE!! Now follow the steps below.

Guide To Flash OREO Update- Method #2:

  • In this method firstly, enable the developer options by clicking 7 times on Build number. Then enable the USB Debugging from Developer Options.
  • Download the ADB_Fastboot_tool_2016.zip and install it on your PC.
  • Now, you have to copy the above WW_15.0410.1711.6.zip to the ADB installation directory.
  • Now, turn off your phone and boot into recovery like said in the above method. And there a select update from ADB.
  • After the above step, you need to connect your phone to your PC. Open Command Prompt (CMD) windows in adb-fastboot-tool-2016 folder by Shift + Mouse Right click

  • To check your device is connected successfully or not type the following command in CMD.

adb devices

  • If successfully connected your device will be on the list. After that type this command to flash the Update. Replace filename with the ZIP name.

adb sideload ” File Name.zip ” 

  • Wait until the process finishes off and then reboot your phone.

If you have face any problems comment in the comment box. If you like the post, don’t forget to share it!!

The post Install Official Android 8.0 OREO Stock ROM On Moto Z2 Force [T-Mobile] appeared first on GizRom.com.

Install Nougat Based Unofficial eUI 6 On Le Max 2

$
0
0

Akash Bagchi

Nougat Based Unofficial eUI 6 On Le Max 2 - Install Nougat Based Unofficial eUI 6 On Le Max 2

Install Nougat Based Unofficial eUI 6 On Le Max 2Nougat Based Unofficial eUI 6 On Le Max 2

Someday ago LeEco shares a basic structure of eUI 6. After this yesterday we found eUI 6 On Le Max 2 that based on Android nougat. Recently we posted Android 8.0 OREO ROM for Le Max 2, we share the link below. If you want to use eUI 6 then you are the right place. This ROM is now running on Alpha stage. Today we share a guide to install Nougat based unofficial eUI 6 on Le Max 2.

Thanks to XDA developer “KuranKaname” to share this Nougat based unofficial eUI 6 on Le Max 2 with us. Some of the bugs in this ROM, maybe it will fix in next update but this is enough stable for daily using. We share all files and write full steps to install the latest Nougat based eUI 6 on Le Max 2.

eUI 6 based on android nougat build for LeEco Le Max2. Some of eUI 6 features missing at this Alpha version but it’s improved with time. You need to be Rooted and TWRP installed on your Le Max 2. You can now experience eUI 6 on Le Max 2. If you want to install this latest eUI 6 Let’s go to the instruction.

Known bugs:

  • Fingerprint and body sensor.
  • Installation APK directly from USB.

Prerequisites:

  • It erases everything on your device so,  creates a full backup of your device.
  • Need to install a TWRP recovery on your device.
  • Your device at least to 40-50% charge for flashing.
  • Download eUI 6 ROM from below.
  • Read the instruction carefully.

⇓⇓ Download Unofficial eUI 6 On Le Max 2 ⇓⇓

LeMax2_EUI6_Pre-A-Test-Rom.zip

You may also like:

Install VOLTE Supported crDroid Custom Rom On Redmi 4A [v3.8.2]

Install 5.8.3-Resurrection Remix Nougat ROM For LG G6

Guide To Install Latest LG Stylo 3 Plus Nougat Firmware

Download LeEco Le Max 2 & Le 2 eUI 5.8.019s OTA Update [India]

Guide To Install AOSP Based Android 8.0 Oreo On MI Max

Guide To Install:

  • Download ” LeMax2_EUI6_Pre-A-Test-Rom.zip “.
  • Copy downloaded file to your device.
  • Turn off your phone and enter recovery mode.
  • In recovery go to ” Wipe And Format Option ⇒ Wipe Data, Cache And Dalvik Cache ” via recovery.
  • Now back to recovery menu and go to Install.
  • Then navigate to the LeMax2_EUI6_Pre-A-Test-Rom.zip file, and swipe for flashing.
  • When the process Completes, reboot your device.

Note: The first-time Reboot will take 4-5 minutes to boot, don’t interrupt the process.

Please share this content if you like this post and comment below if you face any problem during flashing process … 🙂 🙂 🙂

The post Install Nougat Based Unofficial eUI 6 On Le Max 2 appeared first on GizRom.com.

Install Stock Android 8.0 Oreo ROM On ZenFone 4 ZE554KL

$
0
0

Akash Bagchi

Stock Android 8.0 Oreo ROM On ZenFone 4 ZE554KL - Install Stock Android 8.0 Oreo ROM On ZenFone 4 ZE554KL

Install Stock Android 8.0 Oreo ROM On ZenFone 4 ZE554KLStock Android 8.0 Oreo ROM On ZenFone 4 ZE554KL

ASUS now rolling out OREO update on their old devices. Now ASUS send OREO update for ASUS ZenFone 4. Today we share a guide to install Stock Android 8.0 Oreo ROM on ZenFone 4 ZE554KL. Officially this update sends yesterday on ZenFone 4. If you want to install Oreo on ZenFone 4 then you are the right place. This Oreo ROM comes with WW_15.0405.1711.76 build version.

This WW_15.0405.1711.76 update is available for ZE554KL variants. This update is stable version and soon will roll out via OTA on all variant of ZenFone 4. This update comes with build number 15.0405.1711.76. Let’s go to the instruction and download and install manually Oreo ROM on ZenFone 4 ZE554KL.

This OREO update brings many new features like floating home screen shortcuts, Navigation dock, PIP mode, and lots of new settings and features. Also, this ZenFone 4 OREO ROM comes with many bug fixes.if you want to install Oreo On ZenFone 4 Z01KD then let’s go to the instruction below.

Firmware Details:-

  • Android Version: Android v8.0
  • UI Version: ZEN UI
  • Device name: ASUS ZenFone 4
  • Firmware Versions: 15.0405.1711.76
  • Model number: ZE554KL
GizRom Recommendations:

Install Official BETA Android 8.0 Oreo Update On Xiaomi MI A1

Download Android 8.0 Oreo Stock Firmware For HTC U11 (All Collection)

Install Nougat Based Unofficial eUI 6 On Le Max 2

Download Huawei Mate 9 Pro Android 8.0 Oreo Firmware

Install NMJ51B December Security Patch Update On Essential PH-1

Changelog:-

  • Upgrade to Android O.
  • Swipe up to All apps: After OS upgrade, launcher has some important changes- swipe up to all apps, all app icon could be changed.
  • More friendly setting UI design.

⇓⇓ Download 15.0405.1711.76 ROM On ZenFone 4 ⇓⇓

ADB_Fastboot_tool_2016.zip

UL-ASUS_Z01KD_1-WW-15.0405.1711.76-user.zip

Preparation:-

  • Please, first of all, check your device model number.
  • Backup all phone data and important things.
  • Your device at least needs 50% charge for flashing.

Guide To Install with updater app:-

  • Download ” 15.0405.1711.76.Zip ” file from the above-mentioned link.
  • Move the download file in your internal storage.
  • Now rename the file name ” 15.0405.1711.76.zip“.
  • Turn off your phone and enter Recovery Mode by Volume Up + Power Key at the same time.
  • In recovery menu click Apply update from your device storage.
  • Then select to install the Zenfone.zip, which you downloaded before.
  • Wait for complete this process.
  • After process done reboot your device.

If this process fails then follow the steps below.

Guide To Flash The Update:-

  • In this method firstly, enable the developer options by clicking 6 -7 times on Build number. Then enable the USB Debugging from Developer Options.
  • Download the ADB_Fastboot_tool_2016.zip and install it on your PC.
  • Now, you have to copy the above 15.0405.1711.76.zip file to the ADB installation directory.
  • Now, turn off your phone and boot into recovery like said in the above method. And there a select update from ADB.
  • After the above step, you need to connect your phone to your PC. Open Command Prompt (CMD) windows in adb-fastboot-tool-2016 folder by Shift + Mouse Right click

CMD-commend prompt

  • To check your device is connected successfully or not type the following command in CMD.

adb devices

  • If successfully connected your device will be on the list. After that type this command to flash the Update. Replace filename with the ZIP name.

adb sideload ” File Name.zip ” 

  • Wait until the process finishes off and then reboot your phone.

For a more latest update please like our social pages and subscribe newsletter… 🙂 🙂 🙂

The post Install Stock Android 8.0 Oreo ROM On ZenFone 4 ZE554KL appeared first on GizRom.com.


Guide To Unbrick Moto X4 Using Stock Android 8.0 OREO Firmware

$
0
0

Akash Bagchi

Unbrick Moto X4 Using Stock Android 8.0 OREO Firmware - Guide To Unbrick Moto X4 Using Stock Android 8.0 OREO Firmware

Guide To Unbrick Moto X4 Using Stock Android 8.0 OREO FirmwareUnbrick Moto X4 Using Stock Android 8.0 OREO Firmware

Previous year Moto launched their latest device Motorola Moto X4. Nowadays this device has many popular in Motorola series. Many developers had already make rooting file, TWRP recovery, custom ROM, mod and much more. However some ROM and mod not secure for your device. This incorrect process may brick your device. The brick device won’t boot properly. This guide will help you to unbrick Moto X4. Today we share a guide to unbrick Moto X4 using stock Android 8.0 OREO firmware.

Also, we share android 8.0 OREO for Moto X4. This is stable oreo update for Moto_X4. Here we write to install oreo update manually or unbrick Moto X4. This firmware comes with a build number OPW27.57-40. Moto X4 Oreo firmware comes with floating Navigation dock, PIP mode, home screen shortcuts, and lots of new features and settings. If you want to install OREO update or you want to unbrick your device then follow the steps below, both are same.

A bricked device that does not start properly or stuck on boot screen or nothing show on your screen (black screen). You can unbrick Moto X4 with some easy step. Thanks to the Motorola forum to developed and shared this method to install and unbrick Moto X4 Using Stock Android 8.0 OREO Firmware.

Pre-requisites:-

  • Download and install ADB and fastboot driver.
    • For Windows Here
    • For MAC Here
  • Install Moto X4 Driver ⇒ Here
  • Download Firmware from below.
  • Your device at least needs 40% charge for flashing.
  • Read Instructions carefully. 

⇓⇓ Download OREO Firmware For Moto X4 ⇓⇓

Android 7.1.1 Nougat Firmware: PAYTON_NPW26.83-42

Amazon Android 7.1.1 Nougat Firmware: PAYTON_NPW26.83-34-0-1

Android 8.0 Oreo Firmware: PAYTON_OPW27.57-40

You can also like:

Install Oreo Beta 2 OxygenOS 5.0 For OnePlus 5 [Leaked]

Install Nougat Based Unofficial eUI 6 On Le Max 2

Guide To Install Android 8.0 OREO MiFavor 5.2 On Axon 7 [EDL Package]

Download EMUI 8.0 Oreo Firmware For Huawei Mate 9

Install Optimized Oreo ROM On Galaxy S4 [Lineage OS 15]

Guide To Install:-

  • Download Oreo Factory Image and Extract It.
  • Install Moto driver and ADB and fastboot on your computer.
  • Now go to ADB and fastboot installation folder and open command window by holding shift key + right click.
  • Then Boot your Moto X Force in Bootloader mode by pressing Volume Down+Power Button together.
  • Now copy and paste following command in the command box. (If you are using mfastboot then type ” mfastboot ” instead of ” fastboot “)
mfastboot flash partition gpt.bin
mfastboot flash bootloader bootloader.img
mfastboot reboot-bootloader
mfastboot flash modem NON-HLOS.bin
mfastboot flash fsg fsg.mbn
mfastboot erase modemst1
mfastboot erase modemst2 
mfastboot flash bluetooth BTFM.bin
mfastboot flash dsp dspso.bin
mfastboot flash logo logo.bin
mfastboot flash boot boot.img
mfastboot flash system system.img_sparsechunk.0
mfastboot flash system system.img_sparsechunk.1
mfastboot flash system system.img_sparsechunk.2
mfastboot flash system system.img_sparsechunk.3
mfastboot flash system system.img_sparsechunk.4
mfastboot flash system system.img_sparsechunk.5
mfastboot flash system system.img_sparsechunk.6
mfastboot flash system system.img_sparsechunk.7
mfastboot flash system_b system_other.img
mfastboot flash oem oem.img
mfastboot erase carrier
mfastboot erase userdata
mfastboot erase ddr
fastboot reboot
  • After done all process, you see your device boot up.
  • Download “ Nougat OTA 25.11.12 zip ” and copy it to your device.
  • Turn off your phone and enter Recovery Mode.
  • Now click ” Apply update from SD Card ” option.
  • Then navigate to install Nougat OTA 25.11.12 zip on your device.
  • After the process is done, reboot your device.
  • Enjoy.

If you like this post, then share this post with your friends … 🙂 🙂 🙂

The post Guide To Unbrick Moto X4 Using Stock Android 8.0 OREO Firmware appeared first on GizRom.com.

Guide To Unbrick OPPO A37FW (When Vibrating Only)

$
0
0

abhishek shingan

Unbrick OPPO A37FW When Vibrating Only - Guide To Unbrick OPPO A37FW (When Vibrating Only)

Guide To Unbrick OPPO A37FW (When Vibrating Only)Unbrick OPPO A37FW (When Vibrating Only)

Bricked your OPPO A37FW? No need to worry you can recover your OPPO A37FW by using this method. You can unbrick OPPO A37FW by using the following method. If the device is giving the only vibration when starting you can fix it. But be careful after that don’t brick your device. Sometimes it is impossible to unbrick. Though fir snapdragon devices the test point shot method is last option. So let’s start the Guide To Unbrick OPPO A37FW (When Vibrating Only).

Recommended For You:

Required files for download:

  • QCOM Drivers Get them from Here
  • Stock ROM for OPPO A37FW Here

Guide To Unbrick:

  • Extract the Stock ROM on the desktop and find Msm8x39DownloadTool.exe.
  • Now just left click on the START Logo, from the menu select device manager.
  • Power off your device connect it to PC by USB, after power off just hold VOL UP and VOL DOWN buttons at same time.
  • Press those buttons until the device manager gets refreshed (blinked).
  • In the device manager, you will see new port is added.
  • Now open the EXE file we recently extracted.
  • There you will see COM instead of the device not connected.
  • If you see COM then it is ready to download. Tick right on the RESET AFTER DOWNLOAD and press the START button.
  • After downloading, the device will reboot automatically.
  • If in case it didn’t reboot just disconnect the device and hold the power button until it starts.
So, now you have Unbrick OPPO A37FW. Enjoy your device again. Bricked devices mostly are the results of wrong file flashing so avoid the faulty files. If you like the post don’t forget to share it!!

The post Guide To Unbrick OPPO A37FW (When Vibrating Only) appeared first on GizRom.com.

Download And Install Official Xiaomi MI 6 Android 8.0 Oreo ROM

$
0
0

Akash Bagchi

Official Xiaomi MI 6 Android 8.0 Oreo ROM - Download And Install Official Xiaomi MI 6 Android 8.0 Oreo ROM

Download And Install Official Xiaomi MI 6 Android 8.0 Oreo ROMOfficial Xiaomi MI 6 Android 8.0 Oreo ROM

Good news for MI 6 users, latest Xiaomi MI 6 Android 8.0 Oreo update is ready for download. It is the beta ROM for MI 6. Today we share a guide to install Official Xiaomi MI 6 Android 8.0 Oreo ROM. Some users got the update from OTA. Which update brings with MIUI 9 for this device. If you didn’t get the OTA update then follow this post to install this update. Just follow the steps below.

This update comes with an Android version 8.0.0 OPR1.170623.027 and MIUI version MIUI 9 Global ROM 8.1.11 Beta. This update brings all Android Oreo Features along with floating Navigation dock, home screen shortcuts, PIP mode, and lots of new features and settings.

Much more features are added. This is the stable Oreo build. Your device must be running MIUI 9 7.12.14 beta to get this update directly on your device. If you are MI 6 user and your device does not run on this version then follow this post and install this Official Xiaomi MI 6 Android 8.0 Oreo ROM. Many things should have been fixed in this build, you can use it for daily usage.

Preparation:

  • Charge the device up to 60-70%.
  • Driver signature must be disabled in Windows 8,10.
  • Download Fastboot ROM or Recovery ROM.
  • Download required Mi flash tool.

⇓⇓ Download Global Stable MIUI 9.0.2.0 ROM ⇓⇓

MI Flash Tool

MIUI_8.1.4 to MIUI 8.1.11 OTA

MIUI 9 v8.1.11 Global Beta ROM

MIUI 9 v8.1.11 Global Beta ROM (coming soon)

You may also like:

Install NCHMIEI Global Stable MIUI 9.1.4.0 ROM For MI Note 3

Guide To Install China Stable MIUI 9.1.5.0 ROM For MI 5C

Install Official Android 8.0 OREO Stock ROM On Moto Z2 Force [T-Mobile]

Download Android 8.0 Oreo Stock Firmware For HTC U11 (All Collection)

Install Android 8.0/8.1 OREO ROM On OnePlus 5T [Omni 8.0/8.1 ROM]

Guide To Install Recovery ROM:

  • Download Recovery Flashable ROM and copy it to phone memory.
  • Turn off your phone and enter Recovery Mode by Volume UP + Power Key at the same time.
  • Then ‘ wipe and format option ⇒ wipe data, system, cache and Dalvik cache ’ via recovery.
  • Back to recovery menu and click Install.
  • Then navigate to the Recovery Flashable ROM  file, which you downloaded before.
  • Select file and swipe for install.
  • After the process is done, reboot your device.
  • The first-time Reboot will take 4-5 minutes to boot, don’t interrupt the process.

Guide To install Fastboot ROM:

  • Read Preparation.
  • Install Mi Flash Tool.
  • Download Fastboot ROM to your phone model and extract it via 7Zip.
  • Now Turn On your phone into Download Mode by this method.
Charge The Device And HOLD Volume Up + Power On Button And Select Downlaod Mode. 

mi-download-mode
  • Connect Your Phone To Pc and Run Mi Flash Tool “MiFlash.Exe” From “C:\Program Files (x86)\Xiaomi\MiPhone “.
  • Check For Qualcomm HS-USB QDloader Port If  Driver Not Installed Install Manually  Browse Driver From “C:\Program Files (x86)\Xiaomi\MiPhone”.
  • Now Click “Browse” In Mi Flash Tool And Browse The Fastboot Rom Folder And Select Flash All.

mi-flash-tool-redmi-3s

  • Click On Refresh And Flash Button Wait For The Firmware Update Phone Will Auto Reboot After It Done.

mi-flash-tool

Like Xiaomi Dev For Mi Redmi Updates  https://www.facebook.com/XiaomiDev

Like Share Comment Bellow For Any Help

The post Download And Install Official Xiaomi MI 6 Android 8.0 Oreo ROM appeared first on GizRom.com.

Install A520FXXU4BRA8 Galaxy A5 2017 SM-A520F Security patch

$
0
0

abhishek shingan

Install A520FXXU4BRA8 Galaxy A5 2017 SM-A520F Security patch

Install A520FXXU4BRA8 Galaxy A5 2017 SM-A520F Security patch (January 2017)

Install A520FXXU4BRA8 Galaxy A5 2017 SM-A520F Security patchThe A520FXXU4BRA8 security patch of January 2018 is ready for Galaxy A5 2017 SM-A520F smartphone. You find more nougat/Marshmallow full firmware or OTA update on this blog. Officially Samsung launched the latest A520FXXU4BRA8 Galaxy A5 2017 SM-A520F Stock Firmware with latest January 2018 Security Patch. That is an official stock firmware. Enjoy via this update some exclusive features that were introduced in this Android nougat update.

Samsung Released Samsung Galaxy A5 2017 SM-A520F smartphone with Android v6.0.1 (Marshmallow). Galaxy A5 2017 runs 1.9GHz octa-core Exynos 7880 processor and it comes with 3GB of RAM. This device has 32 GB internal storage. This device has 5.2 inches Super AMOLED capacitive touchscreen with a resolution of 1080 x 1920 pixels display. Galaxy A5 2017 packs 16-megapixel rare camera & 16-megapixel front camera.

Samsung is released Android 7.0 for Indian Galaxy A5 2017 SM-A520F variants. This update comes latest security patch update with other some new features. The main thing that it comes with nougat Galaxy A5 2017 SM-A520F Stock Firmware. We created the direct download link to the latest firmware for Galaxy A5 2017 SM-A520F for India. This firmware only for SM-A520F version device. You can install via Samsung Odin tool or Samsung Kies we will guide you how to install via Odin.

Firmware Details:-

  • Android Version: Android 7.0 Nougat
  • UI Version: TouchWiz UI
  • Firmware Versions: A520FXXU4BRA8
  • Device Name: Galaxy A5 2017
  • Model Number: SM-A520F
  • Android security patch level: 01.01.2018
  • Status: Official

Pre-requisites:-

  • Make sure your device model no is SM-A520F.
  • Enable USB Debugging.
  • TURN OFF the Reactivation Lock – Go to Settings > Personal > Lock screen and Security > Find my mobile and log in your Samsung Account. Then uncheck the turn Reactivation lock on.
  • Install Samsung Driver ⇒ Here.
  • Download and Odin and Firmware.
  • Read Instructions carefully.

⇓⇓ A520FXXU4BRA8 Galaxy A5 2017 SM-A520F Firmware ⇓⇓

Odin.zip

BGL-A520FXXU4BRA8-20180111180133_2.zip

Recommended For You:

Guide To Install:-

  • First, extract Odin.zip and A520FXXU4BRA8 firmware.zip via 7zip.
  • Then switch off your phone.
  • Next turn to download mode by pressing and holding Volume Down + Home + Power.
  • After open Odin.exe into the extracted folder.
  • Then connect your phone to PC.
  • Odin will automatically detect your device
  • Then click the Ap Box, and choose the” .tar ” file.
  • Check Auto Reboot and F.Reset Time options.
  • See the Screenshot >

  • Then click Start button to start the installation process.
  • After the process completes Finally, reboot your device and enjoy.

Read full Odin flash guide from ⇒ Here.

Note: The first time it takes 5-10 Minutes to boot your device.

If you face any problem during flashing then comment below we will happy to help you … 🙂 🙂 🙂

The post Install A520FXXU4BRA8 Galaxy A5 2017 SM-A520F Security patch appeared first on GizRom.com.

Install Huawei P10 Nougat B185 Update [VTR-L09/VTR-L29] [Europe]

$
0
0

Akash Bagchi

Huawei P10 Nougat B185 Update VTR L09VTR L29 - Install Huawei P10 Nougat B185 Update [VTR-L09/VTR-L29] [Europe]

Install Huawei P10 Nougat B185 Update [VTR-L09/VTR-L29] [Europe]Huawei P10 Nougat B185 Update [VTR-L09/VTR-L29] [Europe]

Huawei sent a new update in Huawei P10. Latest B185 nougat update is now available for P10. We provide official firmware with CUST and Public data file link below. Today we share Huawei P10 Nougat B185 Update for the European variant device. Let’s some talk about this smartphone.

The Huawei P10 run 2.4GHz octa-core HiSilicon Kirin 960 processor, and it comes with 4GB of RAM. Internal storage is 64GB. It has 5.1 inches IPS-NEO LCD capacitive touchscreen, with a resolution of 1080 x 1920 pixels. This device has Dual 20 + 12-megapixel Leica optics camera and 8-megapixel front camera. It has a Non-removable Li-Po 3200 mAh battery.

This update improves system security with Google security patches. Many users till now don’t get this update via updater app, so if you want to update your device manually, then you are the right place. Here the guide and Huawei P10 Nougat B185 Update link for the VTR-L09/VTR-L29 European version. This update works only VTR-L09/VTR-L29 variants device. Which is build number is VTR-L09C432B185/VTR-L29C432B185. If you are new in this process then, please first read the following step.

Firmware Details:-

  • Android Version: Android v7.0 (Nougat)
  • UI Version: Emotion UI 5.1
  • Firmware Versions: B185
  • Device name: Huawei P10
  • Model number: VTR-L09/VTR-L29
  • Release Date: 04.11.2017
  • Firmware: VTR-L09C432B185/VTR-L29C432B185
  • Status: Official
  • Region: Europe.
  • Changelog: Click here.

Preparation:-

  • At first, check your device model number.
  • Backup complete phone data like contacts, messages, and apps.
  • Your device at least needs 50-60% charge for flashing.

⇓⇓ Download Huawei P10 Nougat B185 Update ⇓⇓

Huawei P10 VTR-L09C432B185

Update.zip

update_full_VTR-L09_hw_eu.zip

update_data_full_public.zip

Huawei P10 VTR-L29C432B185

Update.zip

update_full_VTR-L29_hw_eu.zip

update_data_full_public.zip

You may also like:

G610FDDU1BQH9 On Galaxy J7 Prime Nougat Firmware

Guide To Install Android 8.0 Oreo EMUI 8 ROM For Honor 9

Install Validus 15.1 Android 7.1.2 Nougat ROM On Honor 5c

Download Doogee Mix Stock Firmware, Driver, And Tool

Install B392 Nougat Update On Huawei P9 EVA-L19 variant [Europe]

Guide To Install Update (TWRP method):-

  • Download ” required files from above “.
  • Copy all files to your device.
  • Turn off your phone and enter TWRP recovery mode.
  • In recovery go to Install.
  • Then navigate to the Update.zip file, and swipe for flashing.
  • When the process Completes, again click install then install update_full_VTR-Lxx_hw_eu.zip and update_data_full_public.zip files.
  • Then reboot your device.

Guide To Install Update (dload method):-

  • Download Update.zip File.
  • Extract file.
  • Create ” dload ” folder to root of the SDcard.
  • Copy ” UPDATE.APP ” into the ” dload ” folder.
  • Switch off your device, now hold Volume up + Volume down + Power for a few seconds to start the installation.
  • Flashing will start. After flashing done your phone automatic reboot.

Note: The first time it’s takes 5-10 minutes to boot.

For a more latest update, please like our social pages and subscribe newsletter… 🙂 🙂 🙂

The post Install Huawei P10 Nougat B185 Update [VTR-L09/VTR-L29] [Europe] appeared first on GizRom.com.

Viewing all 917 articles
Browse latest View live